Provision a cloud project — blank, from GitHub, or by cloning a branch.
Creating a cloud project provisions a shared model and specification tree. You receive Owner role, branch main with an initial commit, and the seeded Welcome spec.
For a first-time walkthrough with full screenshots, see First Project. This page adds import, clone, and permission notes.
1. Open the Projects tab
Open your organization and select the Projects tab. The view shows folders and nested projects.
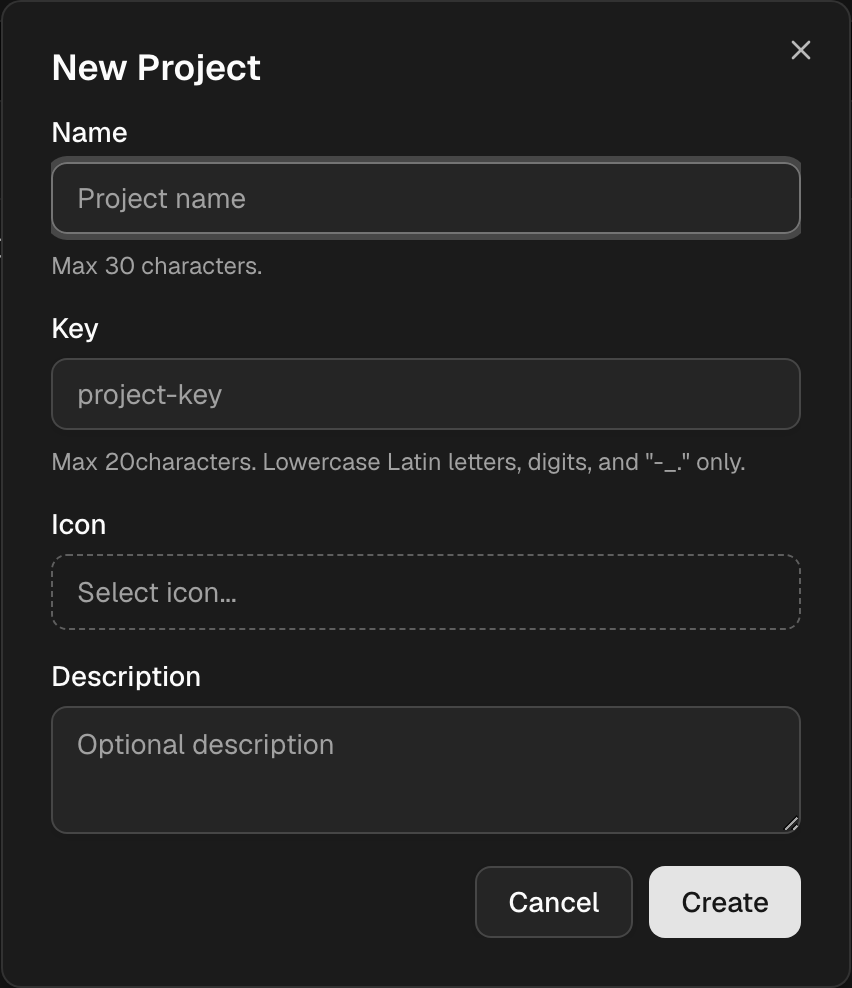
2. Open New Project
| View | Action |
|---|---|
| Empty organization | New Project (center) |
| Existing projects | New (header) → New Project |
| Inside a folder | Same New menu — project is created in that folder |
Creation requires org owner or org admin at the org root, or folder admin (or higher) inside a folder. Local workspaces allow creation unconditionally.
3. Complete the form
| Field | Required | Example | Rules |
|---|---|---|---|
| Name | Yes | IoT Gateway | 1–30 characters |
| Key | Yes | iot-gateway | 1–20 characters; a-z, digits, -, _, .; unique in folder |
| Icon | No | — | Icon picker |
| Description | No | Edge gateway scope | Max 500 characters |
Studio derives the key from the name. Shorten it before Create if the auto-slug is too long for URLs or automation.
4. Create and open
Click Create. Resolve key conflicts by choosing a different key in the same folder.
Select the new row in the tree to open the project. You land on Specs. Expect branch main, a model tree under Explore, and common/welcome.
Import from GitHub
Creates a new cloud project from an existing GitHub repository and starts continuous GitHub Sync with GitHub as the source of truth. Available when the organization plan includes GitHub Sync (GITHUB_SYNC). Not available for local workspaces.
Use the same creation permissions as a blank project (org owner/admin, or folder admin inside a folder).
| View | Action |
|---|---|
| Empty organization | Import from GitHub (center) |
| Existing projects | New → Import from GitHub, or the header Import from GitHub button |
| Inside a folder | Same New menu — the project is created in that folder |
The wizard has three steps: Project → GitHub → Import.
Step 1 — Project
| Field | Required | Notes |
|---|---|---|
| Name | Yes | Same rules as a blank project (1–30 characters) |
| Key | Yes | Auto-derived from the name; editable (1–20 characters; unique in folder) |
| Description | No | Max 500 characters |
Click Next to continue.
Step 2 — GitHub
| Field / action | Notes |
|---|---|
| Repository URL | HTTPS URL, e.g. https://github.com/acme/specs |
| Access token (PAT) | Personal Access Token with read/write access to the repo. Fine-grained: Contents — Read and write on the target repo. Classic: repo scope. Stored encrypted on the project integration for ongoing sync. |
| Verify access | Checks URL and token against GitHub and loads the branch list. Start import stays disabled until verification succeeds. |
| Branches to sync | Select one or more Git branches (up to 20). The repo default branch is pre-selected when possible. Each selected branch is linked to an IOModel branch of the same name (created if missing). |
Click Start import. Studio creates the project shell, connects GitHub with GitHub as the fixed source of truth, and enqueues the import job.
Step 3 — Import
The progress step polls until the job finishes. Typical states: cloning the repository, then importing the model and specs (one pass per selected branch).
| Outcome | What you see |
|---|---|
| In progress | The project row shows an Importing… badge and is dimmed. The project cannot be opened yet. |
| Complete | Import complete — click Open project. Content comes from the repository (no Welcome seed). Ongoing two-way sync is enabled. Manage the connection under Project Settings → GitHub. |
| Failed | Error detail in the dialog. Use Try again to return to the GitHub step, update credentials or branches, then Retry import. |
While an import is running, click the project row (or the notification in the header) to reopen the wizard on the progress step. After success, rotate or update the PAT from Project settings → GitHub if needed.
The repository must follow the IOModel layout (models.yaml, specs/**,
meta.yaml). If the tree is empty or invalid, import fails with a message
describing what was found versus expected. See GitHub
Connection for layout details.
Clone from a branch
Copies one branch’s working copy into a new project. Other branches and GitHub links are not copied.
- New → Clone Project
- Select source project and branch
- Enter metadata and confirm
Outcome
Project row
Visible in the tree with chosen name, key, and Owner role.
Branch main
Default branch ready for work or feature branches.
Seed content
Model skeleton and common/welcome spec.
Next: Project Settings for members and integrations, or First Spec to author content.
Last updated on